Spring Hello World Example 專案 之 Annotation
本範例實作說明:
本篇主要使用 Spring Framework,做一個基本測試專案,
有使用到 Spring bean 。
一、範例開發準備工具
作業系統: Windows 7
開發工具: Eclipse Java EE IDE for Web Developers Juno Service Release2
JAVA JDK : JDK 1.6
其它相關: Maven 4.0
Springframework 3.2.2.RELEASE
二、新增Maven範例專案
範例專案名稱: SpringAnnotationHelloWorldExample
圖1 開啟Eclipse -> File -> New -> Maven Project
(如果找不到Maven Project ,請選Other..-> Maven -> Maven Project)

圖2 選擇專案存放位置 use default Workspase location-> Next
選擇存放在預設的工作資料夾下(就是你開Eclipse時,選擇Workspase下)

圖3 使用 Maven 範本
本例選用:
Group id : org.apache.maven.archetypes
Artifact id : maven-archetype-quickstart
Version : 1.1
-> Next
註:
Group id為公司名稱 or 群組分類名稱
Artifact Id 為專案標識符,就是專案名稱

圖4 範例專案
Group id : SpringAnnotationHelloWorldExample
Artifact id : SpringAnnotationHelloWorldExample
Version : 0.0.1-SNAPSHOT
Package : com.levin
-> Finish
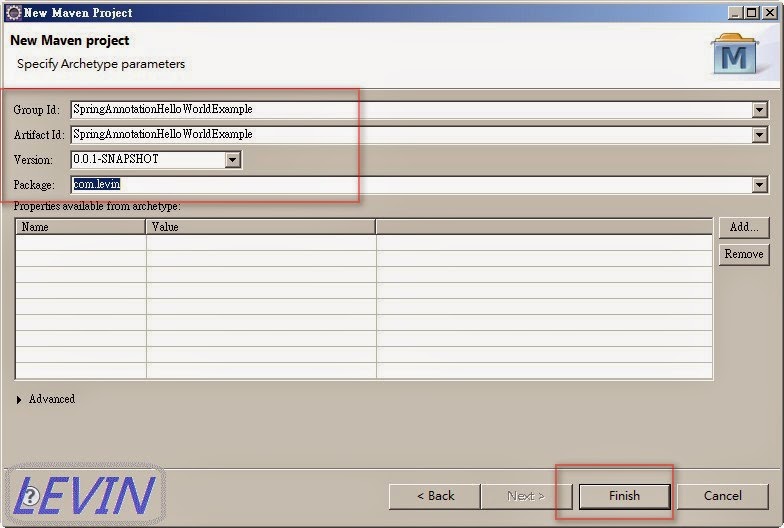
圖5 新增專案後,基本預設資料

三、使用相關jar檔
<dependency>

   <groupId>org.springframework</groupId>

   <artifactId>spring-core</artifactId>

   <version>${spring.version}</version>

  </dependency>


  <dependency>

   <groupId>org.springframework</groupId>

   <artifactId>spring-context</artifactId>

   <version>${spring.version}</version>

  </dependency>
圖6 開啟 pom.xml

<project xmlns="http://maven.apache.org/POM/4.0.0" xmlns:xsi="http://www.w3.org/2001/XMLSchema-instance"

 xsi:schemaLocation="http://maven.apache.org/POM/4.0.0 http://maven.apache.org/xsd/maven-4.0.0.xsd">

 <modelVersion>4.0.0</modelVersion>


 <groupId>SpringHelloWorldExample</groupId>

 <artifactId>SpringHelloWorldExample</artifactId>

 <version>0.0.1-SNAPSHOT</version>

 <packaging>jar</packaging>


 <name>SpringHelloWorldExample</name>

 <url>http://maven.apache.org</url>


 <properties>

  <project.build.sourceEncoding>UTF-8</project.build.sourceEncoding>

  <spring.version>3.2.2.RELEASE</spring.version>

  <jdk.version>1.6</jdk.version>

 </properties>


 <dependencies>

  <!-- Spring 3 dependencies -->

  <dependency>

   <groupId>org.springframework</groupId>

   <artifactId>spring-core</artifactId>

   <version>${spring.version}</version>

  </dependency>


  <dependency>

   <groupId>org.springframework</groupId>

   <artifactId>spring-context</artifactId>

   <version>${spring.version}</version>

  </dependency>

 </dependencies>


 <build>

  <finalName>SpringHelloWorldExample</finalName>

  <plugins>

   <plugin>

    <groupId>org.apache.maven.plugins</groupId>

    <artifactId>maven-eclipse-plugin</artifactId>

    <version>2.9</version>

    <configuration>

     <downloadSources>true</downloadSources>

     <downloadJavadocs>false</downloadJavadocs>

    </configuration>

   </plugin>

   <plugin>

    <groupId>org.apache.maven.plugins</groupId>

    <artifactId>maven-compiler-plugin</artifactId>

    <version>3.0</version>

    <configuration>

     <source>${jdk.version}</source>

     <target>${jdk.version}</target>

    </configuration>

   </plugin>

  </plugins>

 </build>

</project>
四、建立 Java 檔
建立三支Java 檔
路徑:src/main/java/com/levin
檔名:
IHelloMessage.java
HelloWorld.java
Application.java
圖7

五、編輯 IHelloMessage.java
路徑檔名:src/main/java/com/levin/IHelloMessage.java
package com.levin;


public interface IHelloMessage {

    String getMessage();

}
六、編輯 HelloWorld.java
路徑檔名:src/main/java/com/levin/HelloWorld.java
package com.levin;


import org.springframework.beans.factory.annotation.Autowired;

import org.springframework.stereotype.Component;


@Component

public class HelloWorld {


    final private IHelloMessage service;


    @Autowired

    public HelloWorld(IHelloMessage service) {

        this.service = service;

    }


    public void printHello() {

        System.out.println(this.service.getMessage());

    }

}
七、編輯 Application.java
路徑檔名:src/main/java/com/levin/Application.java
package com.levin;


import org.springframework.context.ApplicationContext;

import org.springframework.context.annotation.*;


@Configuration

@ComponentScan

public class Application {


 @Bean

 IHelloMessage mockHelloMessage() {

  return new IHelloMessage() {

   public String getMessage() {

    return "Spring Framework Annotation Hello World!";

   }

  };

 }


 public static void main(String[] args) {

  ApplicationContext context = new AnnotationConfigApplicationContext(Application.class);

  HelloWorld printer = context.getBean(HelloWorld.class);

  printer.printHello();

 }

}
八、測試 - 執行
圖8 點選 Application.java ->在Application內容 按右鍵 -> Run As -> Java Application

圖9 執行結果

十二、其它參考
Struts + Spring + Hibernate 目錄
Spring Framework 首頁
[apache_Maven] Eclipse 裡 Maven 安裝教學
其它文章

 留言列表
留言列表

